I am only getting started with BME680 Breakout but already grasping for the stars – and at a loss! :-D The article suggests:
Why not visualise the gas resistance readings with one of our LED boards?
-
The BME680 Breakout goes onto pins 1, 3, 5, 7, and 9 of my Pi (the bottom left 5 pins on the GPIO header).
-
Following the tutorial for Assembling the Mood Light would mean soldering all 2x20 pins of the Unicorn pHAT. That would make it impossible to connect both BME680 Breakout and Unicorn pHAT to the Pi. I found this pinout for the Unicorn pHAT but I have trouble reading it. It appears to me that I do not need to connect all 2x20 pins, but only 2, 5 6, 9, 12, 14, 20, 25, 30, 34 and 39.
Can someone confirm this?
I am using the following hardware:
- Pi Zero W & Unicorn pHAT (included in Mood Light - Pi Zero W Project Kit /PIM259)
- BME680 Breakout - Air Quality, Temperature, Pressure, Humidity Sensor /PIM357
- GPIO Hammer Header Male + Female + Installation Jig /PIM296
- NOOBS 16GB microSD card (2.7) /RPI-024
I would decidedly prefer to use the Hammer Headers to soldering. Is this possible?
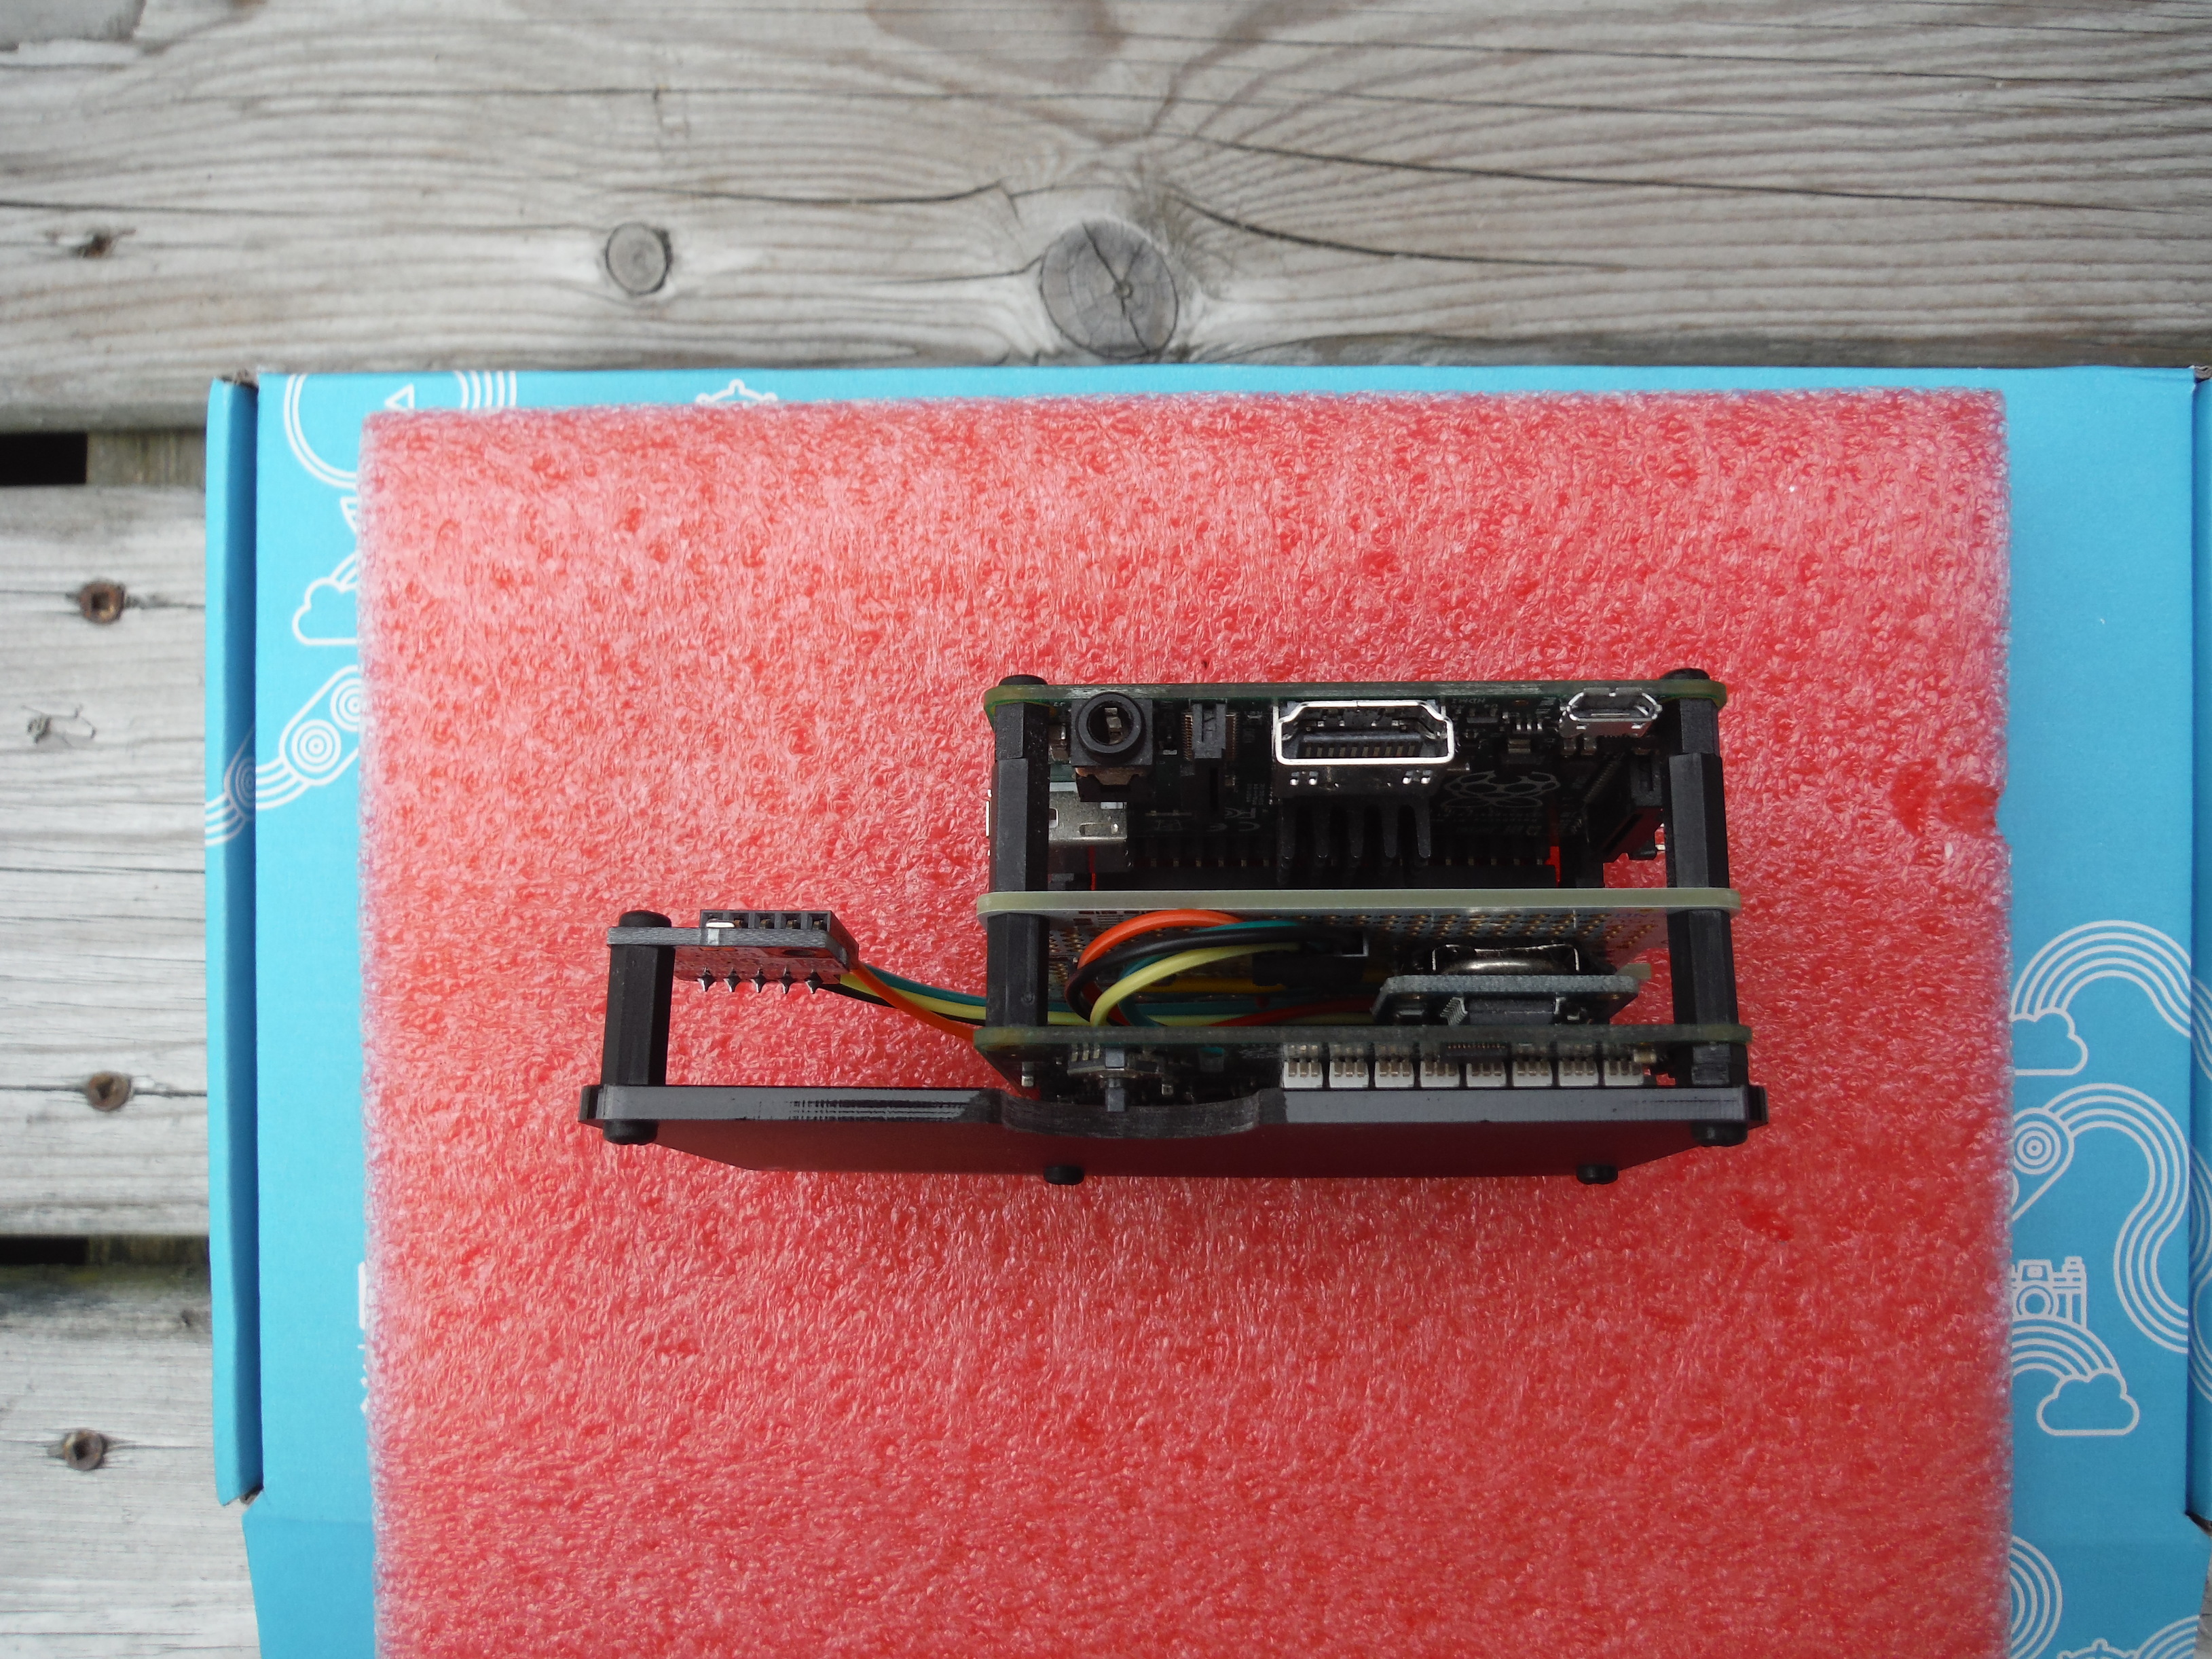
What I did was connect my BME680 via female jumpers, to a male header I soldered to a Proto Hat. On the Proto Hat I then wire the male header to the appropriate GPIO pins with jumper wire. Like so.
The Proto Hat has a stacking header on it. I plug the Proto Hat into my Pi, then my Unicorn Hat HD on top of that. Thats the plan anyway. Right now a Sense Hat is in place that will eventually be replaced with the Unicorn Hat HD. I display a scrolling message with date, time, temp, humidity, and barometric pressure on the sense hat 8 x 8 LED matrix. I want to up that to 16 x 16. I have to sort out my python code first though on a test setup.
EDIT: In your case you may want to use a proto zero, https://shop.pimoroni.com/products/protozero
And maybe skip the male headers, just solder your wires right on the proto zero and BME680.
My BME680 is on a cable so I can remote mount it away from any heat given off by the PI and Unicorn Hat HD. Its why I stopped using the sensors on the sense hat. Radiant heat from the Pi’s CPU makes the temp reading inaccurate and read artificially high. Especially if you have it in a case. On my portable weather clock my BME680 is mounted externally on the outside of my case.
The Raspberry Pi I’m using is an A+. It small, and lets me use 4 standoffs that line up with the Proto Hat perfectly. Then 4 more standoffs to hold my Hat in place.
Thats my indoor weather clock. It has a black ninja difusser on the front
If you really want to avoid any soldering, the fully assembled Mini Black Hat Hack3r might be an option.
https://shop.pimoroni.com/products/mini-black-hat-hack3r?variant=19448025991
Then hammer headers on the Pi and Unicorn pHat.
No guaranties, but if your careful, you can likely put the BME680 on a female hammer header, then just plug that into the Mini Black hat.
If you put a female hammer header on the bottom side of a Pi Zero, same way you do it on a pHat. It can plug into the Mini Black hat board the same way you plug a pHat in. No having to use a ribbon cable.
There is also this, https://shop.pimoroni.com/products/phat-stack?variant=658973392906
Thanks a lot @alphanumeric! I am going to try the jump wire approach. Have already ordered and will attempt this weekend.
Still not sure about how to read that pinout. Can you help me there?
For the Unicorn pHat pins 2, 6, 9, 12, 14, 20, 25, 30, 34 and 39 are in use. Most of them are ground connections. You posted 2, 5, 9…its actually 2, 6, 9 etc.
Absolutely right, thanks!
So I am supposed to connect both BME680 and Unicorn pHAT to pin 9? (Please bear with me. I am new this and trying figure out things as I get along.)
I’m planning on playing around with my Unicorn Hat HD today. I have a BMP180 hooked up for testing. It was sitting in my parts box doing nothing. I only really need one sensor reading to get my code working.
I want to display the reading in a scrolling message, then change the color of the text based on the reading. Red for a high temperature reading (IE Hot out), Blue text if its below 0c etc. A visual indication and the actual reading in a numerical display.
I’m already doing it on my sense hat, its pretty easy as the python code for it has an easy to use scroll function. And display a variable is pretty simple too. LED matrix is only 8x8, and its all I’m using n the sense hat at the moment. So I want to swap that out for the 16x16 Unicorn Hat. Scrolling text, especially displaying variables isn’t so easy though from the looks of it.
So I’ll tinker with it in a test setup so I can keep using my sense hat setup without interruption until I get my code working. No having to take things apart and swap parts back and forth. Saves on the wear and tear.
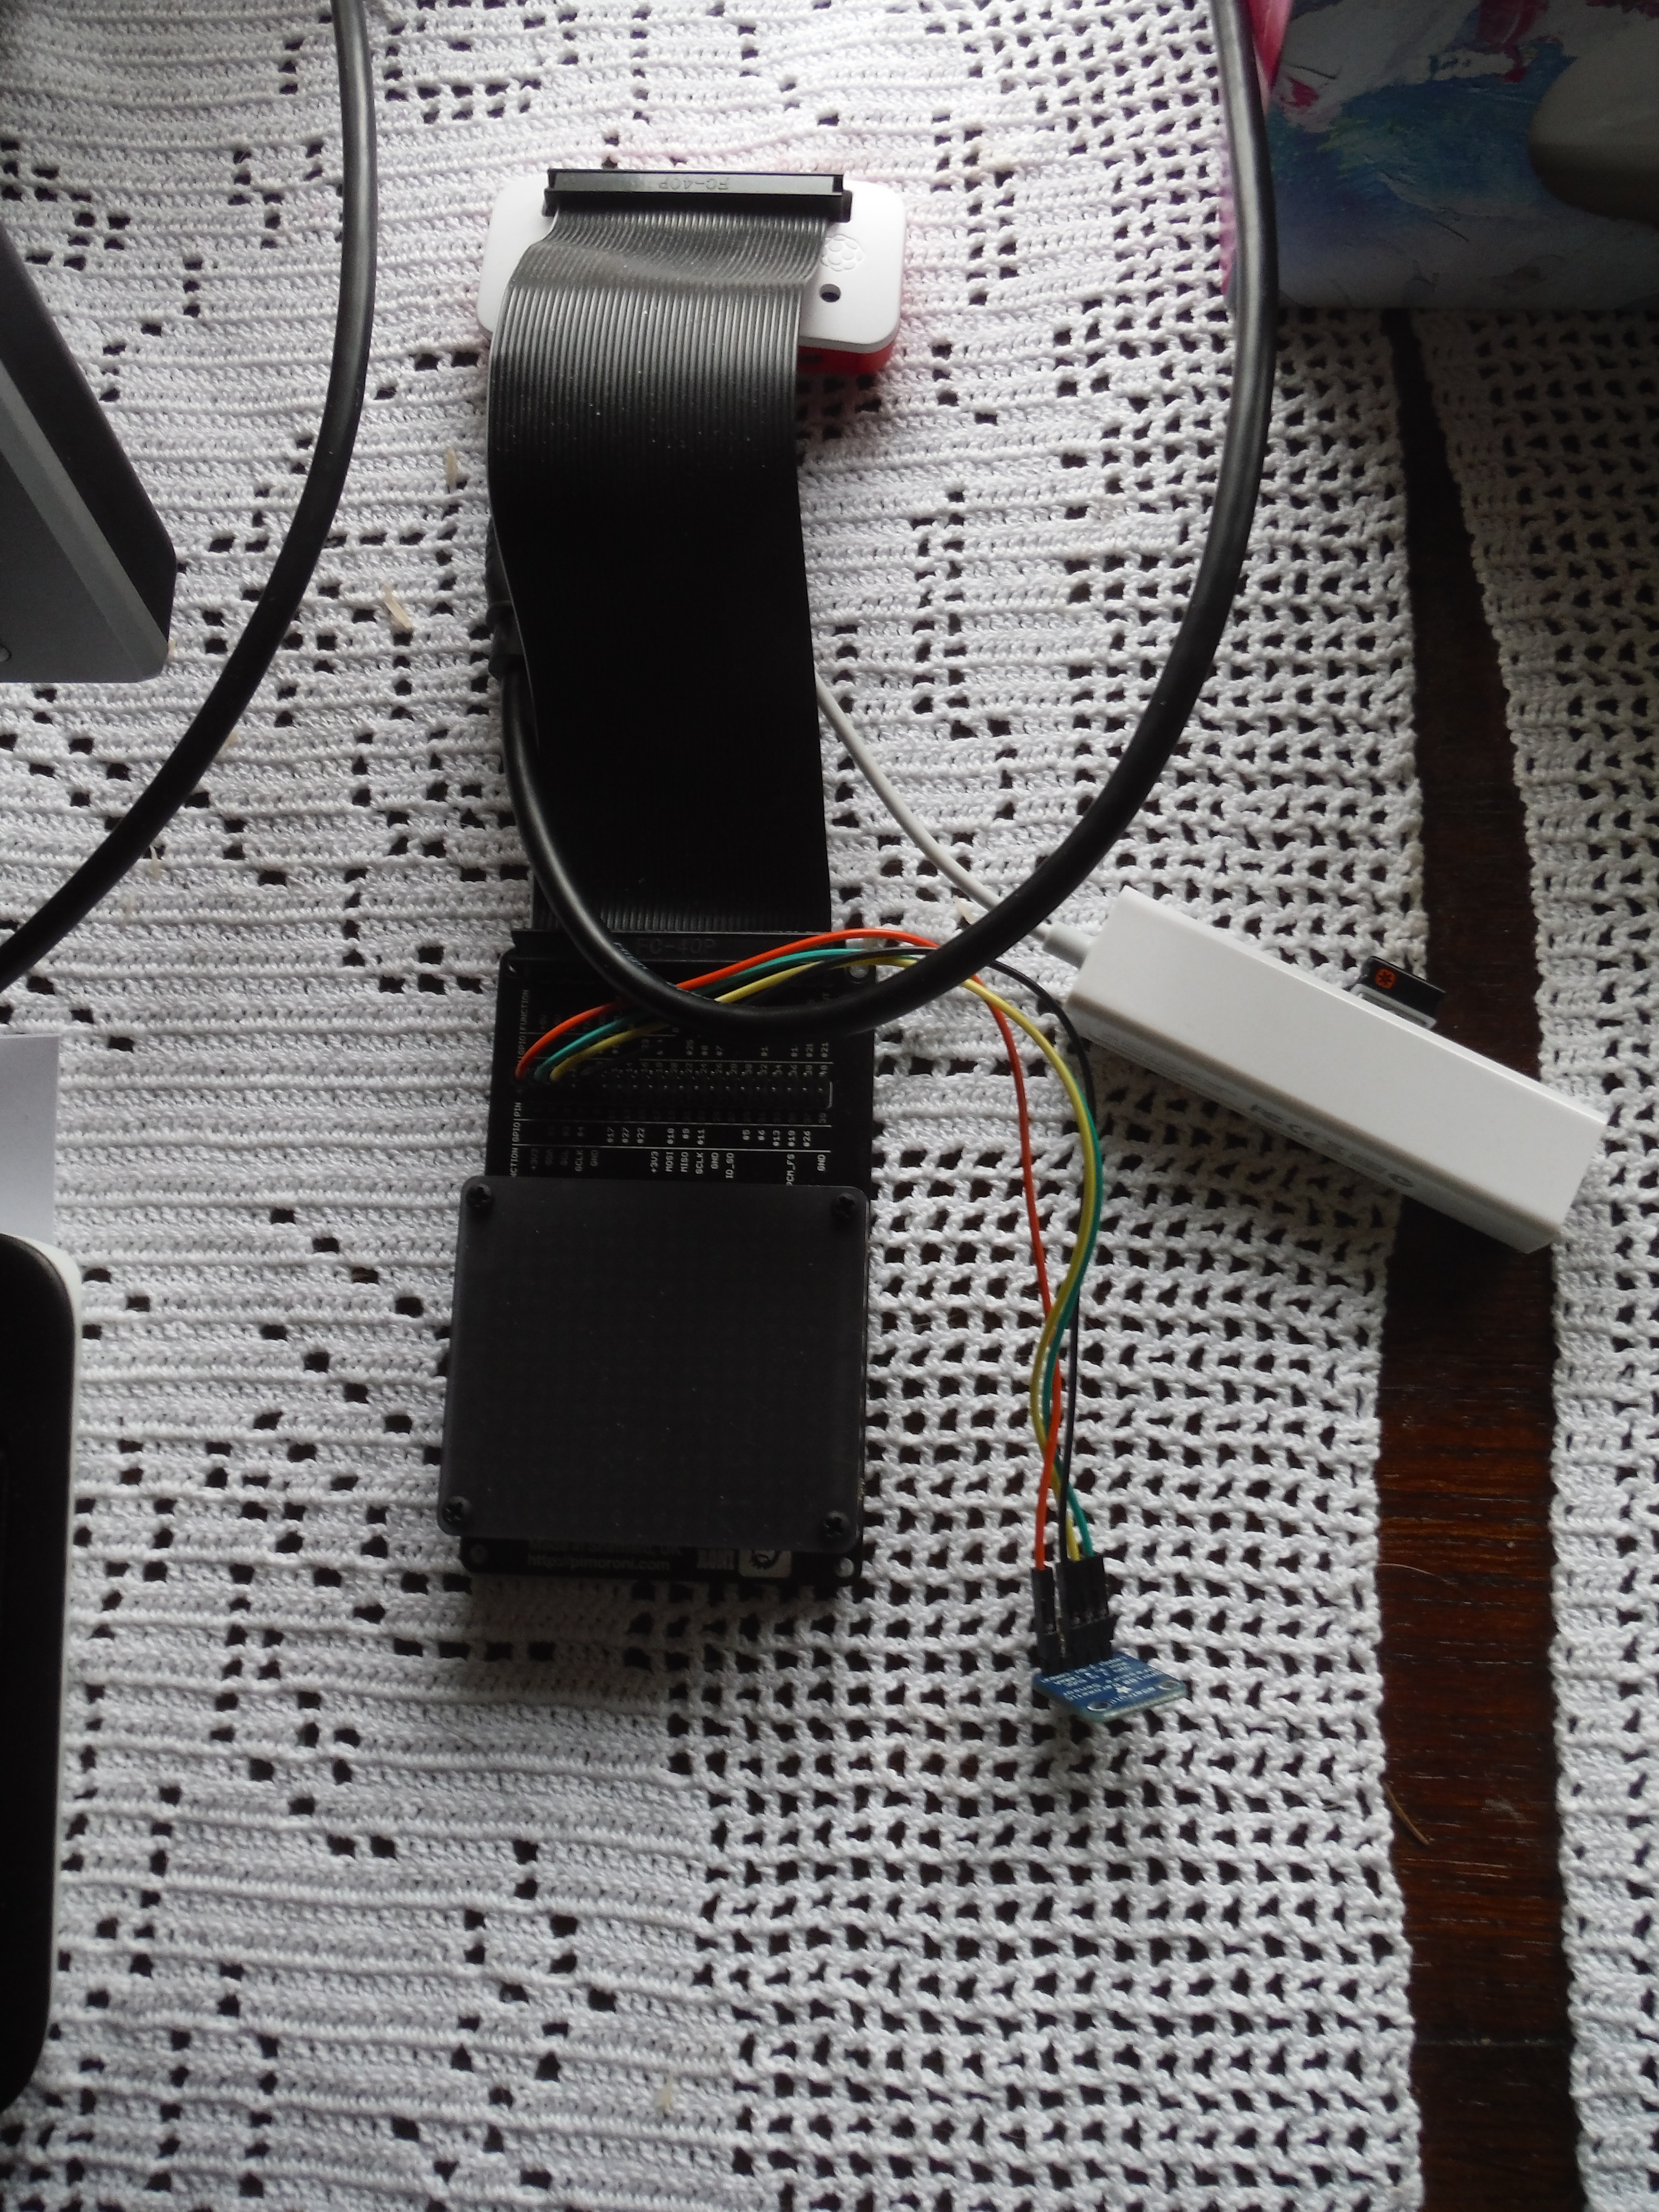
I put the Unicorn Hat HD on a Black Hat Hack3r board (not a mini) and connected the BMP180 with female jumpers.
This is what I do when using jumpers, just personal preference really, but it makes diagnosing things easier if your circuit doesn’t work.
+5V > Red,
+3.3V > Orange
Ground > Black
SCA (i2c) > Green
SCL (i2c) > Yellow
Really helps if you have more than one sensor board (multiple i2c devices) hooked up if you only ever use 1 specific color for a specific function. Assuming you have enough of each color jumper. You may have to get creative if your hooking up a lot of grounds etc. Use grey for some or something.
So I am supposed to connect both BME680 and Unicorn pHAT to pin 9? (Please bear with me. I am new to this and trying figure out things as I get along.)
Yes, thats just a ground pin. Ground will be a common connection for just about everything you connect to a Pi VIA GPIO. Its the return for the +5V and or +3.3V, the - side if you will.
All the pins marked as Ground are a common ground on the Pi itself, they are all connected together. On a Hat they may not be all linked together. Thats why so many are marked on the pinout for the Unicorn pHat. It’s not always possible to link them all together via circuit tracks. When you plug the pHat or hat into the Pi, the Pi links them all together and connects them all to the ground plain. Sometimes you only need one sometimes you need several if you go the Jumper route. The BME680 only needs the one. It doesn’t have to be pin 9, it can be any one of the GPIO ground Pins.