from googleapiclient.discovery import build
from inky.auto import auto
from PIL import Image, ImageDraw, ImageFont
from datetime import datetime, timedelta

# My API key
API_KEY = 'xxxx'
CALENDAR_ID = 'xxxx'

# Initialize the Google Calendar API client
service = build('calendar', 'v3', developerKey=API_KEY)

# Automatically detect the display
inky_display = auto()
width, height = inky_display.resolution

# Load the image
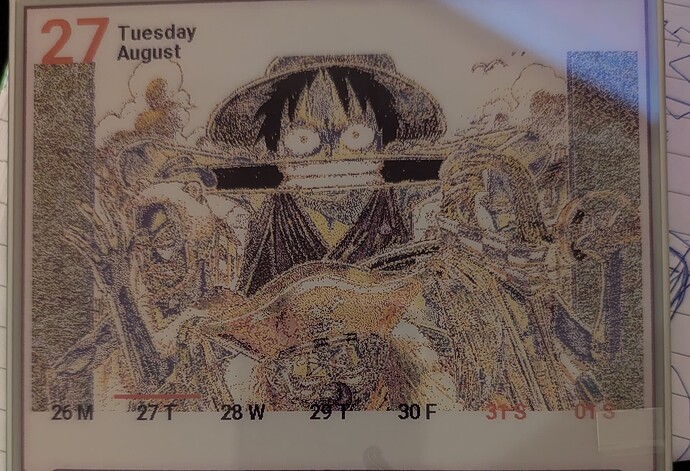
img = Image.open('/home/giovanni/onesmall.jpg')

# Resize the image to 600x350 pixels
img = img.resize((600, 350), resample=Image.LANCZOS)

# Create a new image for the background with the same mode and size as the display
background = Image.new("P", (width, height), color=inky_display.WHITE)

# Calculate position to center the 600x350 image on the 600x448 background
x_position = 0  # Centered horizontally (600 width fits exactly)
y_position = (height - 350) // 2  # Centered vertically

# Paste the resized image onto the background at the calculated position
background.paste(img, (x_position, y_position))

# Convert the image to the appropriate color mode for the display
if inky_display.colour == "blackwhite":
    background = background.convert("1")
elif inky_display.colour == "red":
    background = background.convert("P")
    background = background.quantize(colors=2, method=1, kmeans=2, palette=inky_display.PALETTE_RED)
elif inky_display.colour == "yellow":
    background = background.convert("P")
    background = background.quantize(colors=2, method=1, kmeans=2, palette=inky_display.PALETTE_YELLOW)
elif inky_display.colour == "multicolor":
    background = background.convert("P")
    background = background.quantize(colors=4, method=1, kmeans=2, palette=inky_display.PALETTE_MULTI)

# Set the saturation level (if needed)
inky_display.set_image(background, saturation=1)

# Define fonts
font_large = ImageFont.truetype("/usr/share/fonts/truetype/roboto/Roboto-Bold.ttf", 65)
font_medium = ImageFont.truetype("/usr/share/fonts/truetype/roboto/Roboto-Bold.ttf", 20)
font_small = ImageFont.truetype("/usr/share/fonts/truetype/roboto/Roboto-Regular.ttf", 18)
font_xsmall = ImageFont.truetype("/usr/share/fonts/truetype/roboto/Roboto-Regular.ttf", 14)

# Draw on the image directly
draw = ImageDraw.Draw(background)

# Display the current date at the top left
today = datetime.now()
day_number = today.strftime("%d")
day_name = today.strftime("%A")
month_name = today.strftime("%B")

# Set positions for the day number and the day/month texts
day_number_x = 5
ascent, descent = font_large.getmetrics()
day_number_y = 50 - ascent

day_name_x = day_number_x + 80  # Adjust for space between number and text
day_name_y = day_number_y + 20  # Align vertically with the number
month_name_y = day_name_y + 20  # Position below the day name

# Draw the date
draw.text((day_number_x, day_number_y), day_number, inky_display.RED, font=font_large)
draw.text((day_name_x, day_name_y), day_name, inky_display.BLACK, font=font_medium)
draw.text((day_name_x, month_name_y), month_name, inky_display.BLACK, font=font_medium)

# Display the current week at the bottom
days_of_week = ["M", "T", "W", "T", "F", "S", "S"]
start_of_week = today - timedelta(days=today.weekday())  # Calculate Monday of the current week
end_of_week = start_of_week + timedelta(days=7)

# Fetch events for the current week from the public calendar
events_result = service.events().list(
    calendarId=CALENDAR_ID,
    timeMin=start_of_week.isoformat() + 'Z',
    timeMax=end_of_week.isoformat() + 'Z',
    singleEvents=True,
    orderBy='startTime'
).execute()
events = events_result.get('items', [])

# Prepare a dictionary to store events by day
events_by_day = {start_of_week.date() + timedelta(days=i): [] for i in range(7)}

for event in events:
    start = event['start'].get('dateTime', event['start'].get('date'))
    start_date = datetime.fromisoformat(start).date()
    if start_date in events_by_day:
        events_by_day[start_date].append(event['summary'])

# Loop over the next 7 days to display day numbers and events
for i in range(7):
    day = start_of_week + timedelta(days=i)
    day_label = day.strftime("%d")  # e.g., "19"
    day_initial = day.strftime("%a")[0]  # e.g., "M" for Monday

    # Set color for the current day
    if day.date() == today.date():
        day_color = inky_display.RED if i in [5, 6] else inky_display.BLACK
        # Draw a thick red line under the day number (only for the current day)
        line_y = height - 65
        section_width = width // 7  # Calculate the width of one section
        draw.line((i * section_width, line_y, (i + 1) * section_width, line_y), fill=inky_display.RED, width=4)
    else:
        day_color = inky_display.BLACK if i < 5 else inky_display.RED

    # Calculate x position for each section (centered within each section)
    section_width = width // 7
    x_position = i * section_width

    # Calculate positions for day number and initial to the right of the day number
    day_label_bbox = draw.textbbox((0, 0), day_label, font=font_medium)
    day_initial_bbox = draw.textbbox((0, 0), day_initial, font=font_medium)

    day_label_width = day_label_bbox[2] - day_label_bbox[0]
    day_initial_width = day_initial_bbox[2] - day_initial_bbox[0]

    # Calculate the x position for day_initial to the right of day_label
    day_label_x = x_position + (section_width - (day_label_width + day_initial_width + 5)) // 2
    day_initial_x = day_label_x + day_label_width + 5

    # Draw the day number and weekday initial
    draw.text((day_label_x, height - 60), day_label, day_color, font=font_medium)
    draw.text((day_initial_x, height - 60), day_initial, day_color, font=font_medium)

    # Calculate position for the bullet point text, left-aligned under the day number
    y_position = height - 35

    # Display a maximum of two events for the current day
    events_for_day = events_by_day.get(day.date(), [])[:2]  # Get at most 2 events
    for event_title in events_for_day:
        draw.text((x_position + 10, y_position), f"• {event_title}", inky_display.BLACK, font=font_xsmall)
        y_position += 20  # Move down for the next event

# Set the updated image on the display
inky_display.set_image(background)

# Display the image on the Inky display
inky_display.show()
