I’ve had a project in mind for a over a year now. Rather simple. But I’ve no idea where to start and or what parts i need.
So I’ll explain the project. As from the title. I’m looking to have a four inch or maybe smaller screen displaying footage from a camera placed near the the end of my BB rifle. (I play airsoft). And I’d like the screen placed over my right eye. If I’m able to do what id like. I’ll have a friend construct me an adjustable frame to house the screen.
I’ve no idea what Pi or parts or what screen would be best to use.
Keeping in mind this all needs to be powered from a powerbank I’ll have in a pouch on my tac-vest.
I’ve had a look at a HyperPixel 4.0 and from what i can work out it connects to a Pi 4 using a GPIO? Connecter which then sits on top of the pi 4. If this is true. Is there a way to house the Pi 4 in a pocket and have say a MiniHDMI cable connected from one to another? And then have a long enough cable to attach a camera. One that i can at least unplug when taking my kit off. Or would it be better housing the Pi 4 on the gun somewhere with the camera attached and a cable to screen?
Any suggestions and help would be very much appreciated.
The GPIO connector is that 40 pin connector across one edge of the Pi, opposite the power and HDMI ports. And the Hyperpixel uses pretty well every GPIO pin. It does not use an HDMI cable and doesn’t plug into the HDMI jacks.
The Pi 4 is the most power hungry Pi yet and thus isn’t really a good choice, IMHO, for a battery powered setup. A Pi 3A+ might be a better choice as its lighter and will use less power to run. https://www.raspberrypi.org/documentation/faqs/#pi-power
I hesitate to recommend a Pi Zero as it might struggle to display a continuous video stream. I tried one with Motion Eye OS and it just didn’t have the oomph to keep up.
If you go with HDMI from Pi to display your likely looking at a 5 inch or bigger screen. Go with a PiTFT that plugs into the GPIO and you can go smaller.
This may work though if its big enough. It probably is if up close in front of one eye.
You’d only need a cable with 7 wires in it to remote mount the display away from the Pi. It uses GPIO but only the SPI part. There would be a fair bit of codding to get it to display the video feed though. That won’t happen automatically it only shows what you tell it to show.
I’m assuming you can’t get like a 1meter GPIO cable to go from whichever screen I use from the position of my head down the back and into a pocket to whichever Pi I use. The have another cable down my body and arm to a camera. Also guessing the cameras don’t have very long cables?
I’m not sure if there is a screen say 4" or maybe a bit smaller that uses miniHDMI or something that I can easily unplug. When taking the kit off.
Usually to extend the GPIO you use a ribbon cable.
You’d need a female to male version to extend a display though, and as you say a long one.
Adafruit have a 5 inch HDMI screen. I personally haven’t seen anything smaller that uses HDMI.
You can roll your own cable for a GPIO connected screen. You’ll need some soldering skills to pull it off.
The simplest in terms of cables and or wiring the display would be to go with a PiTFT plugged right into say a Pi 3A+ https://www.adafruit.com/?q=pItft
It will be heavier than if you had just the display though, there are always tradeoffs with these types of projects. Then just a power cable and cable to your camera.
If you did want to remote mount the display your looking at something like this maybe.
One on the Pi with a female header and one on the display with a male header. Then a cable soldered to the pins in use between the two.
Yes, it “should” work with a Pi 3A+. The 3A+ has a regular size HDMI which appears to be what that display uses. It comes with a HDMI dongle bit. The touch works though the GPIO header. It’s only a 26 pin header but thats not an issue as the those 26 pins match the pinout of the first 26 or a 40 pin header. You’ll just have a power cable and your camera cable.
Keep in mind that the 3A+ only has one USB device port. Not the 4 like other full sized Pi’s. You may need a USB hub to do your setting up and configuring. I use this one with mine.
I plug it in to setup motion eye, then remove it when I’m all done. My Motion Eye Pi 3A+'s are used as surveillance cameras. I have 4 setup so far, two have pan tilts on them.
What camera would be best to use. It would need to be placed on the rifle. With a cable that’s I guess 1.5m long. Again I’d need to be able to unplug it and have it go down the rifle and to the Pi 3A+ in a pocket?
I’m using the Pi foundation V2 camera, thats likely not going to work for you as it uses a ribbon cable. If you used that camera you’d need something like this
It doesn’t plug into the Pi’s HDMI port. It goes something like this
Pi’s CSI > Camera ribbon cable to HDMI plug adapter > HDMI Cable > other adapter back to the camera ribbon cable > Pi camera ribbon cable connector.
It’s two adapters that go between the Pi’s CSI connector and the camera.
Ok so do I need a small ribbon cable to go between the pi and the hdmi extension cable?
That solution would be brill as I can just unplug it when I’m not wanting to use it. And I’m guessing I can easily swap cameras. Like if I wanted to swap to like a thermal camera.
Ok so I’ve been looking at this camera. Not sure if this would work to the extension cable you linked?
And can you get anything to attach to a camera for like a zoom?
The extension kit I linked to above comes with two short ribbon cables and two HDMI adapters. Plus the nuts and bolts to mount the camera to one of the adapters.
Pi CSI > ribbon cable > adapter > HDMI cable > adapter > ribbon cable > camera
The camera you linked to will work.
I have one of these, and it clips to the camera. It’s fixed focus though, you can’t Zoom in and out. It has an adjustment ring but thats just to get the picture in focus. I had to build a makeshift support for mine to keep it nice and level and hold it up.
Be very very careful opening those camera board ribbon cable locking bars. Both on the camera and the Pi and adapter boards. Be gentile or you may break one.
Also pay attention to how the ribbon cables go in. Get it wrong, with the contacts on the wrong side and its the same as having no cable plugged in. Nothing bad happens, the camera just doesn’t work.
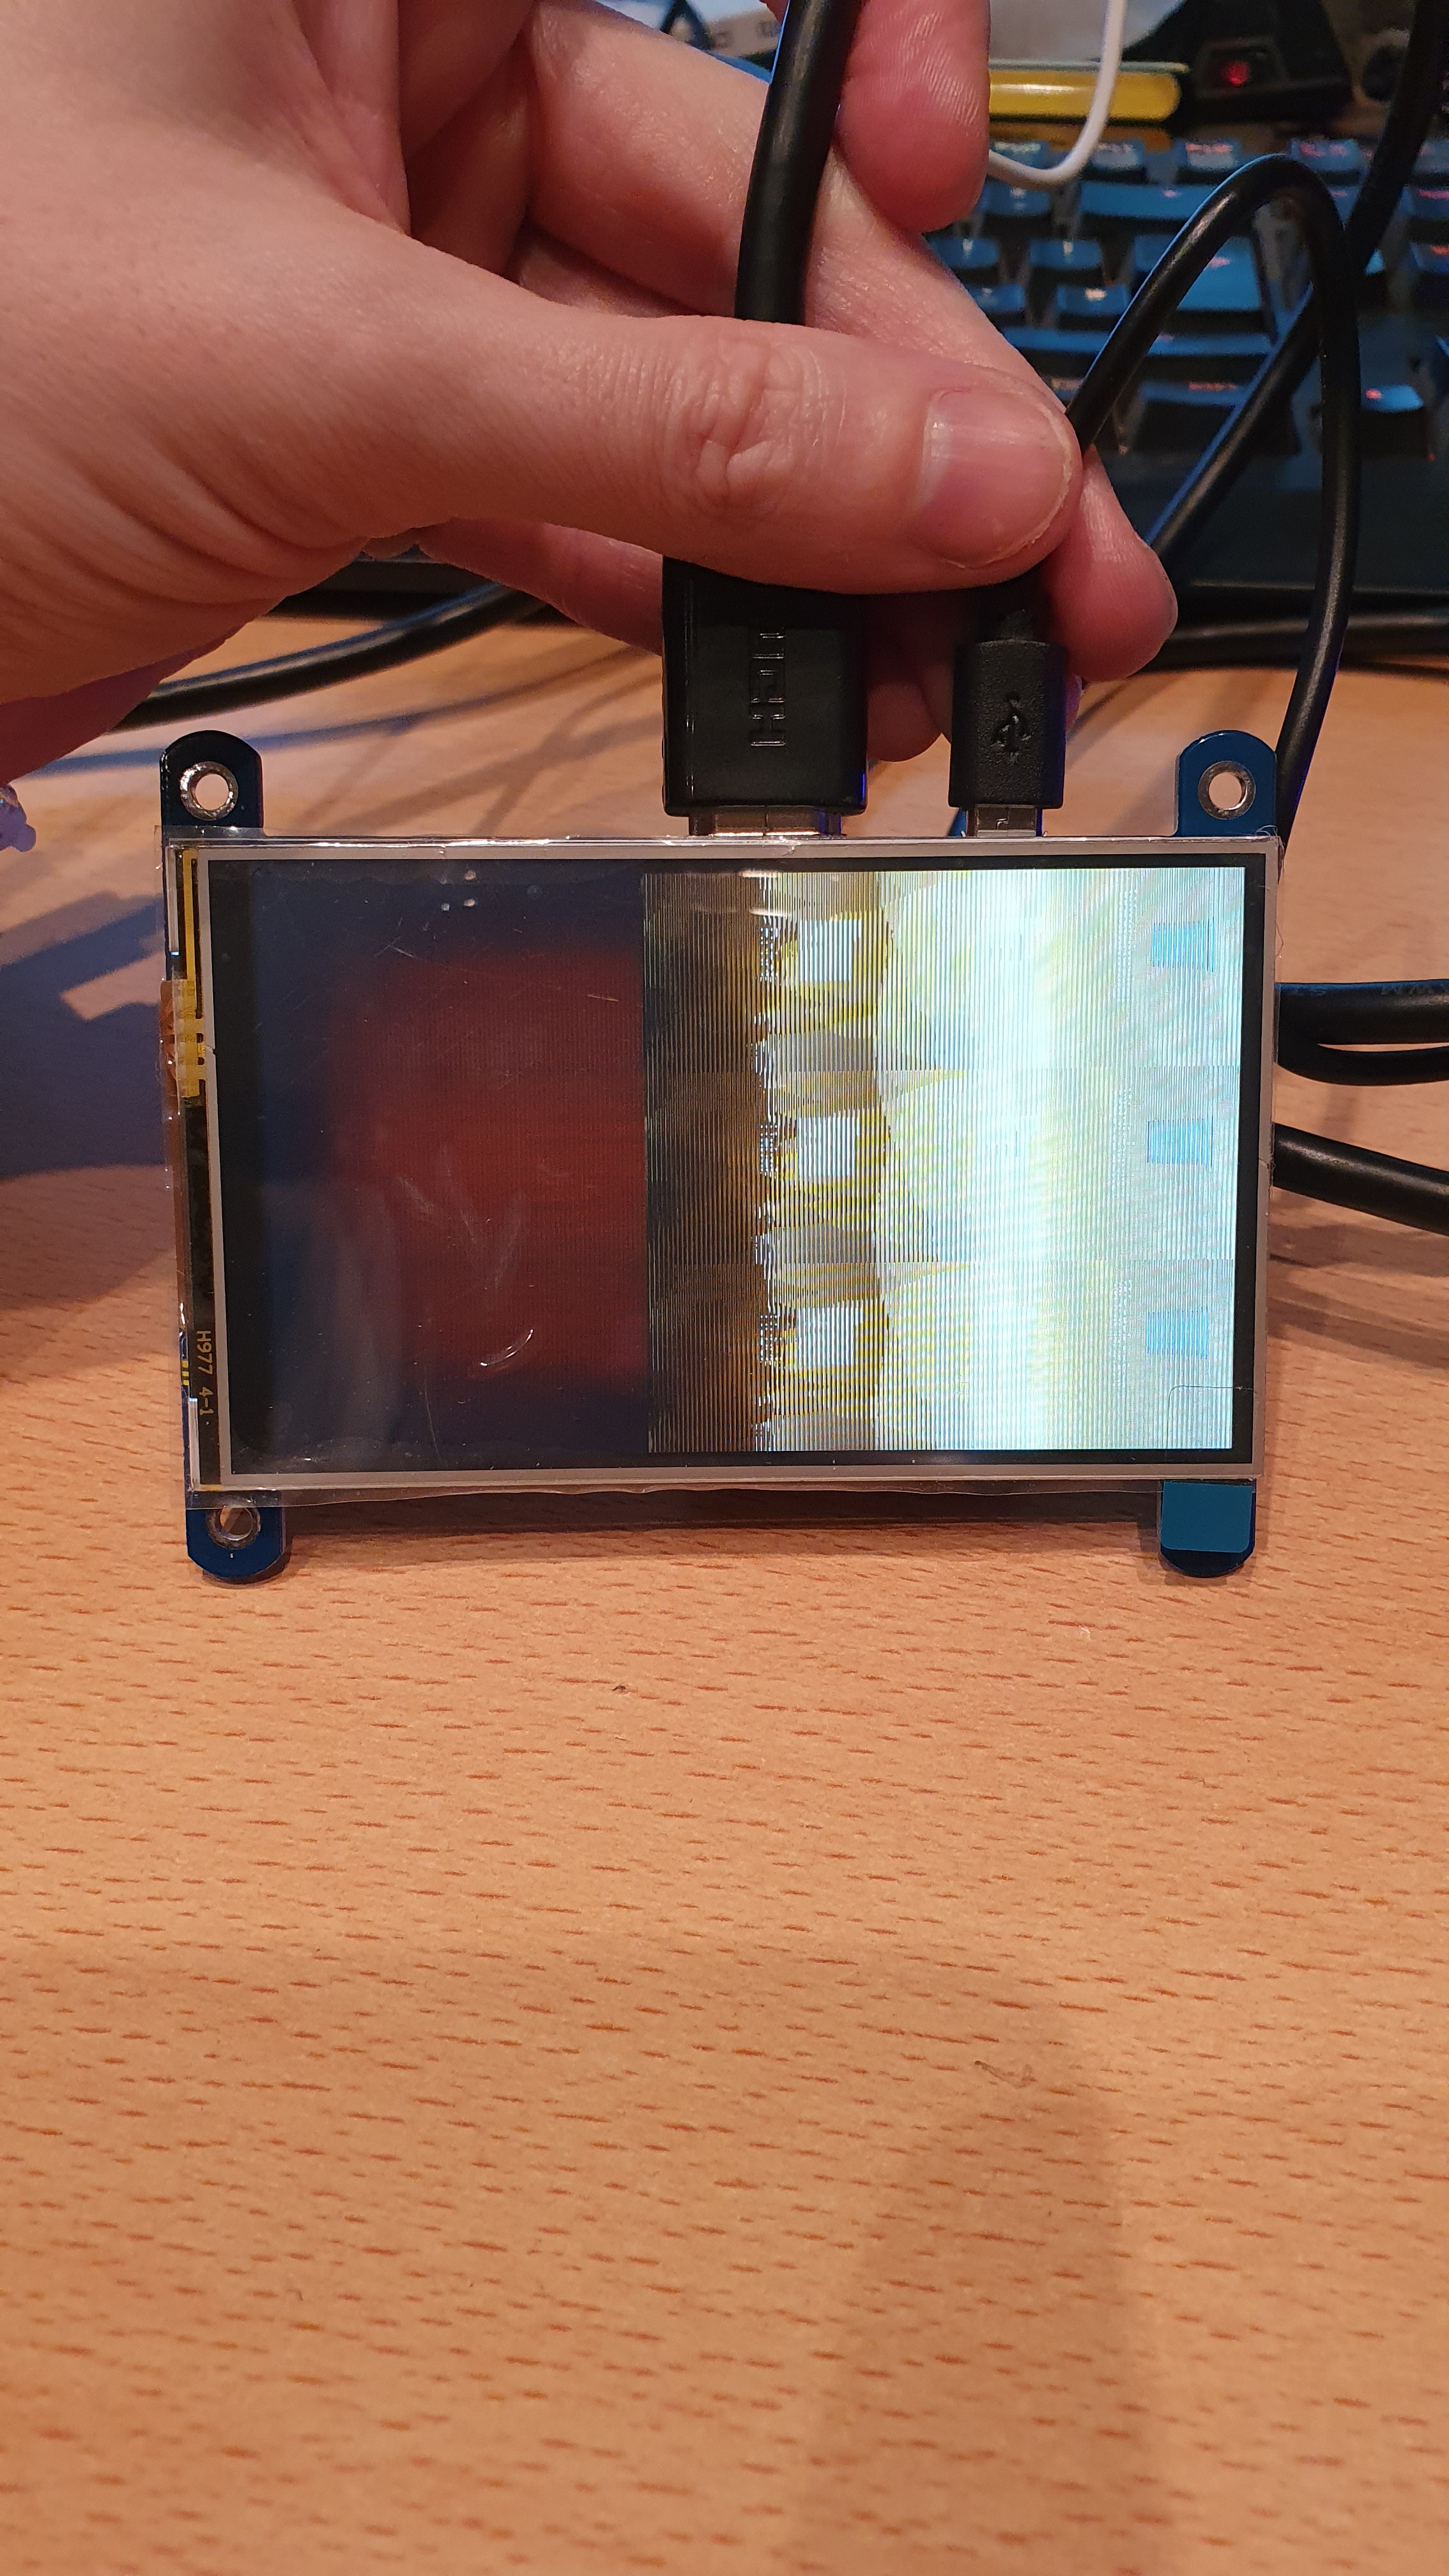
Evening. So got the Pi up and running on my computers screen. Got everything working. Camera works fine.
And my small 4inch screen I linked has just arrived.
Problem I’ve got is when I plug it into the 4inch screen. It’s doing this.
Plugged in before booting up?
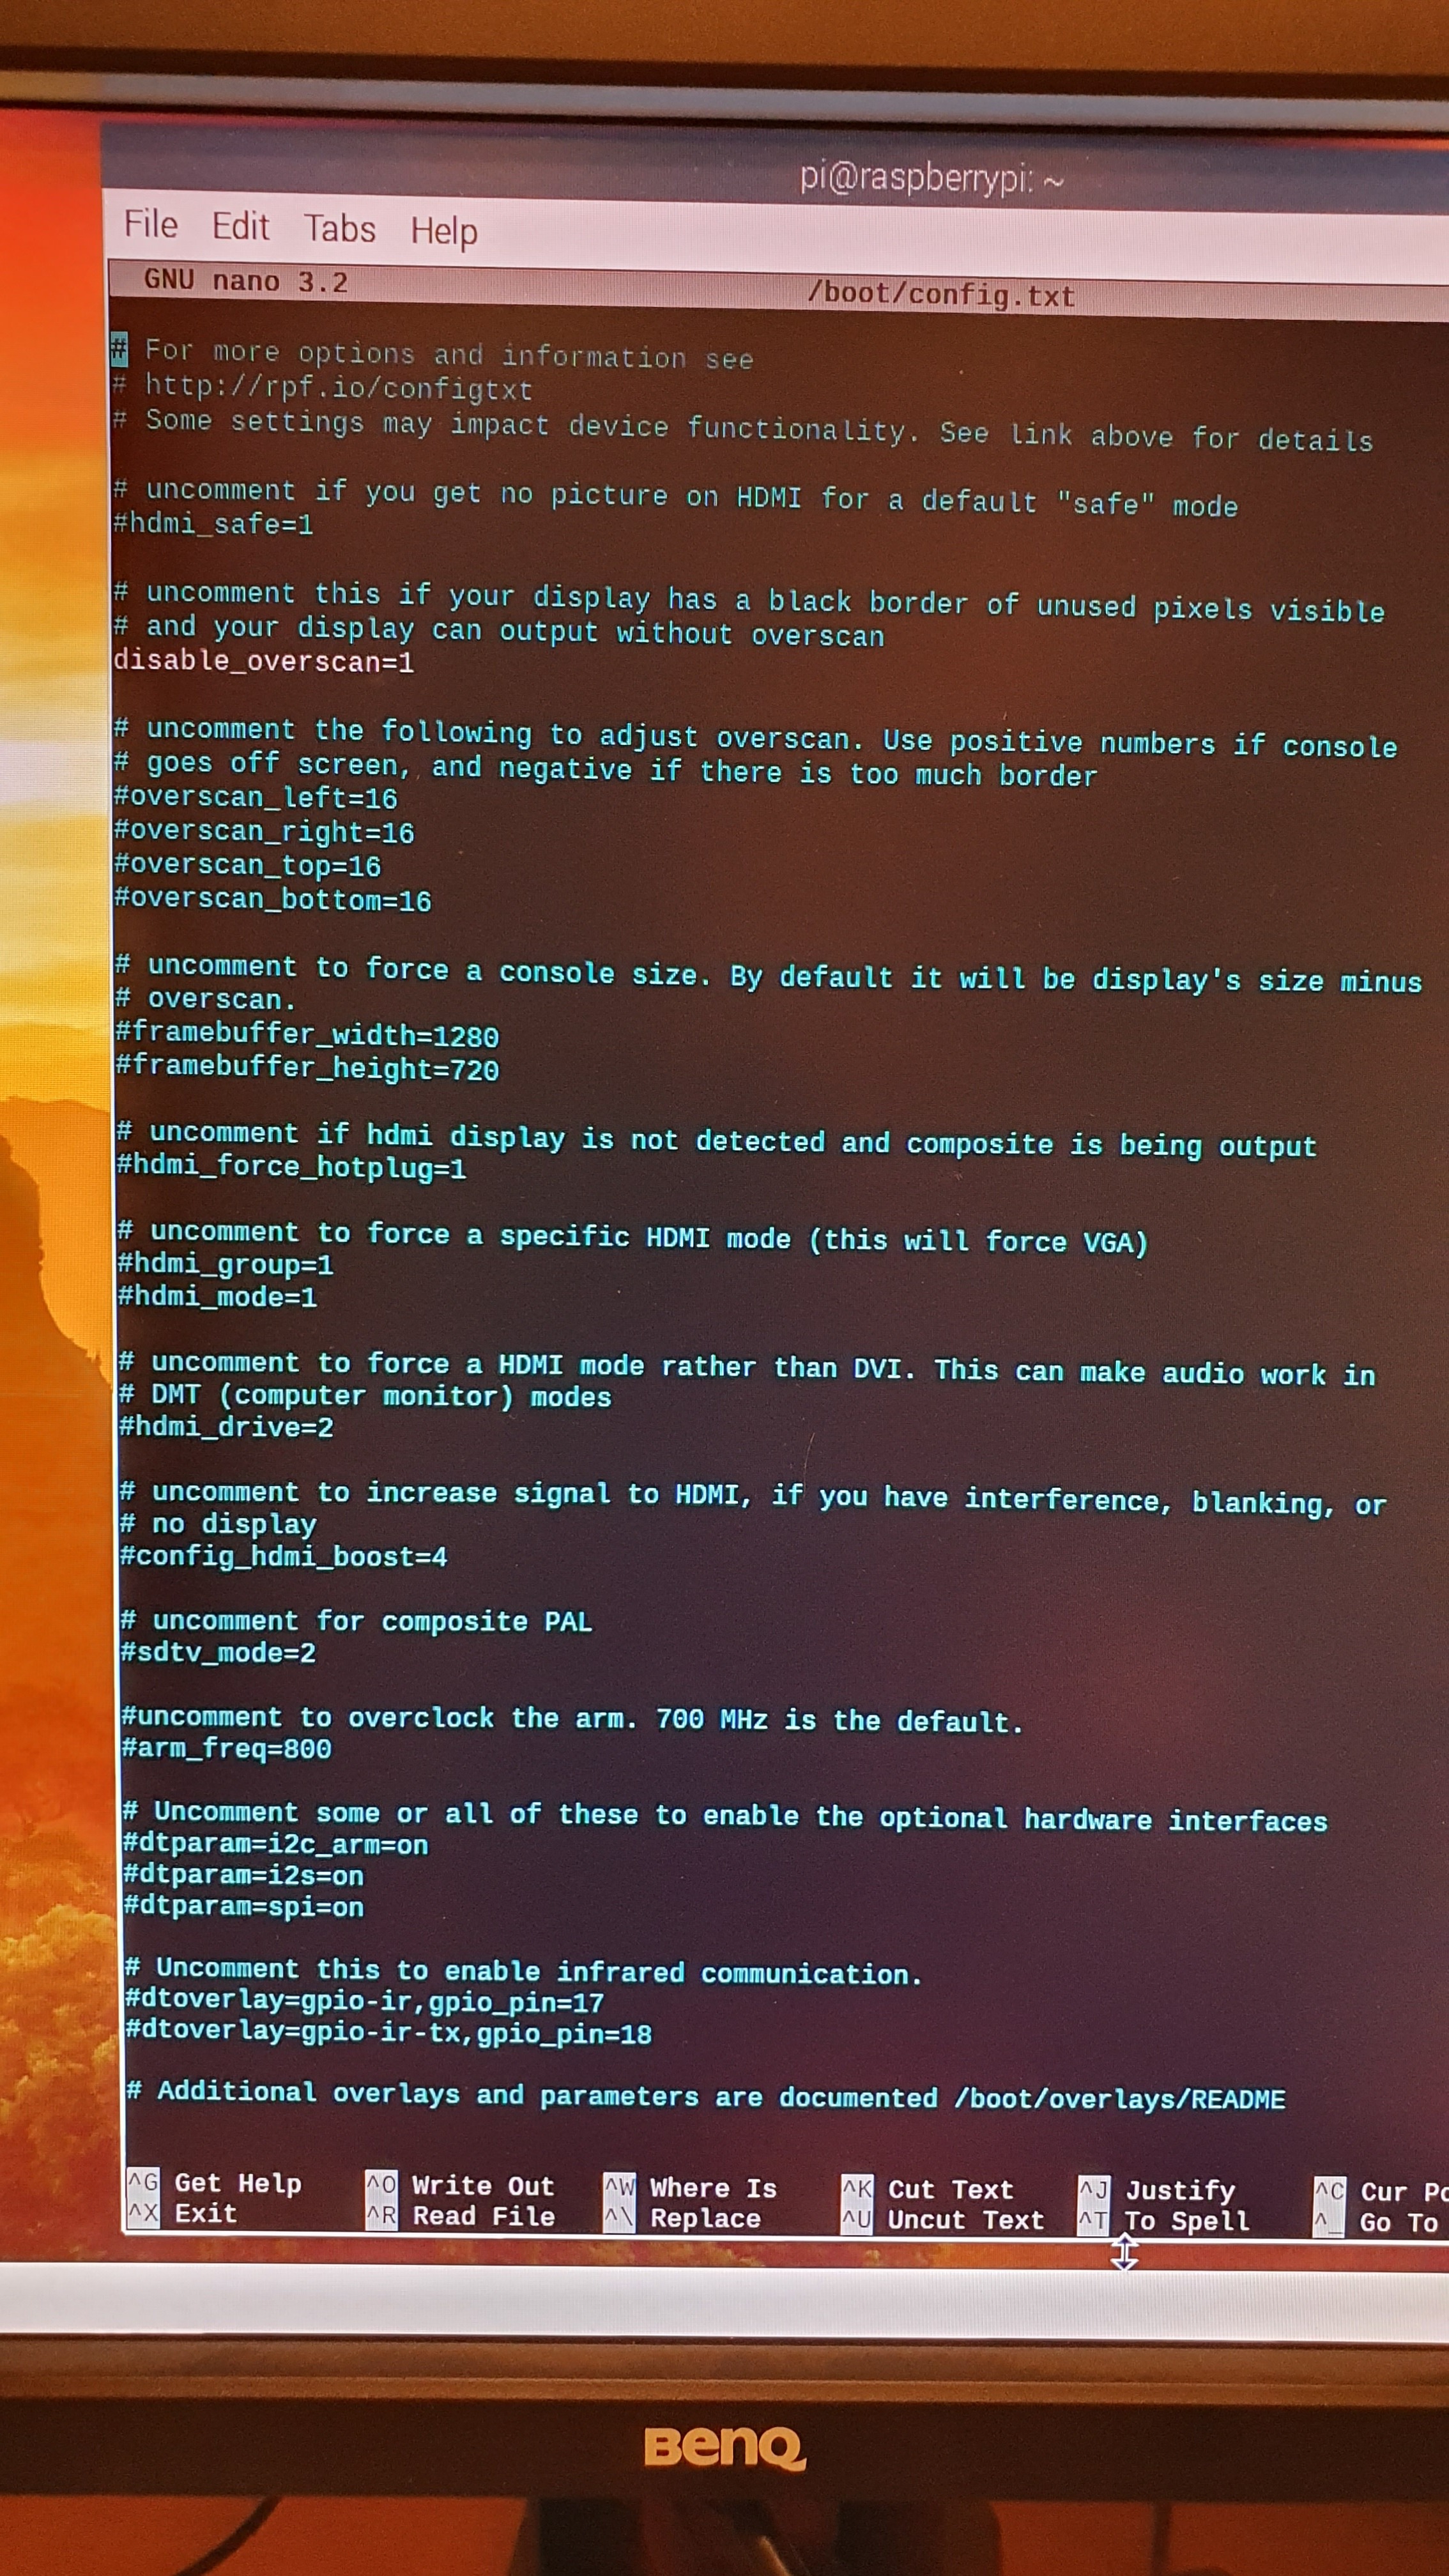
Have a look see in your config.txt file sudo nano /boot/config.txt
for disable_overscan=1
If it says disable_overscan=0, try changing it to 1.
ctrl + x, y, enter to save the edit.
If that doesn’t help change it back to what it was before you changed it.